Lesson 2: Georeferencing in Allmaps
In this lesson, we’ll get hands-on experience georeferencing maps in Allmaps.
Allmaps Editor
If you haven’t already, launch the Allmaps Editor by going to editor.allmaps.org.
You can choose a map by either:
- Entering a IIIF Manifest URL in the text box at the top of the page
- Scrolling down to find a map in one of the highlighted collections
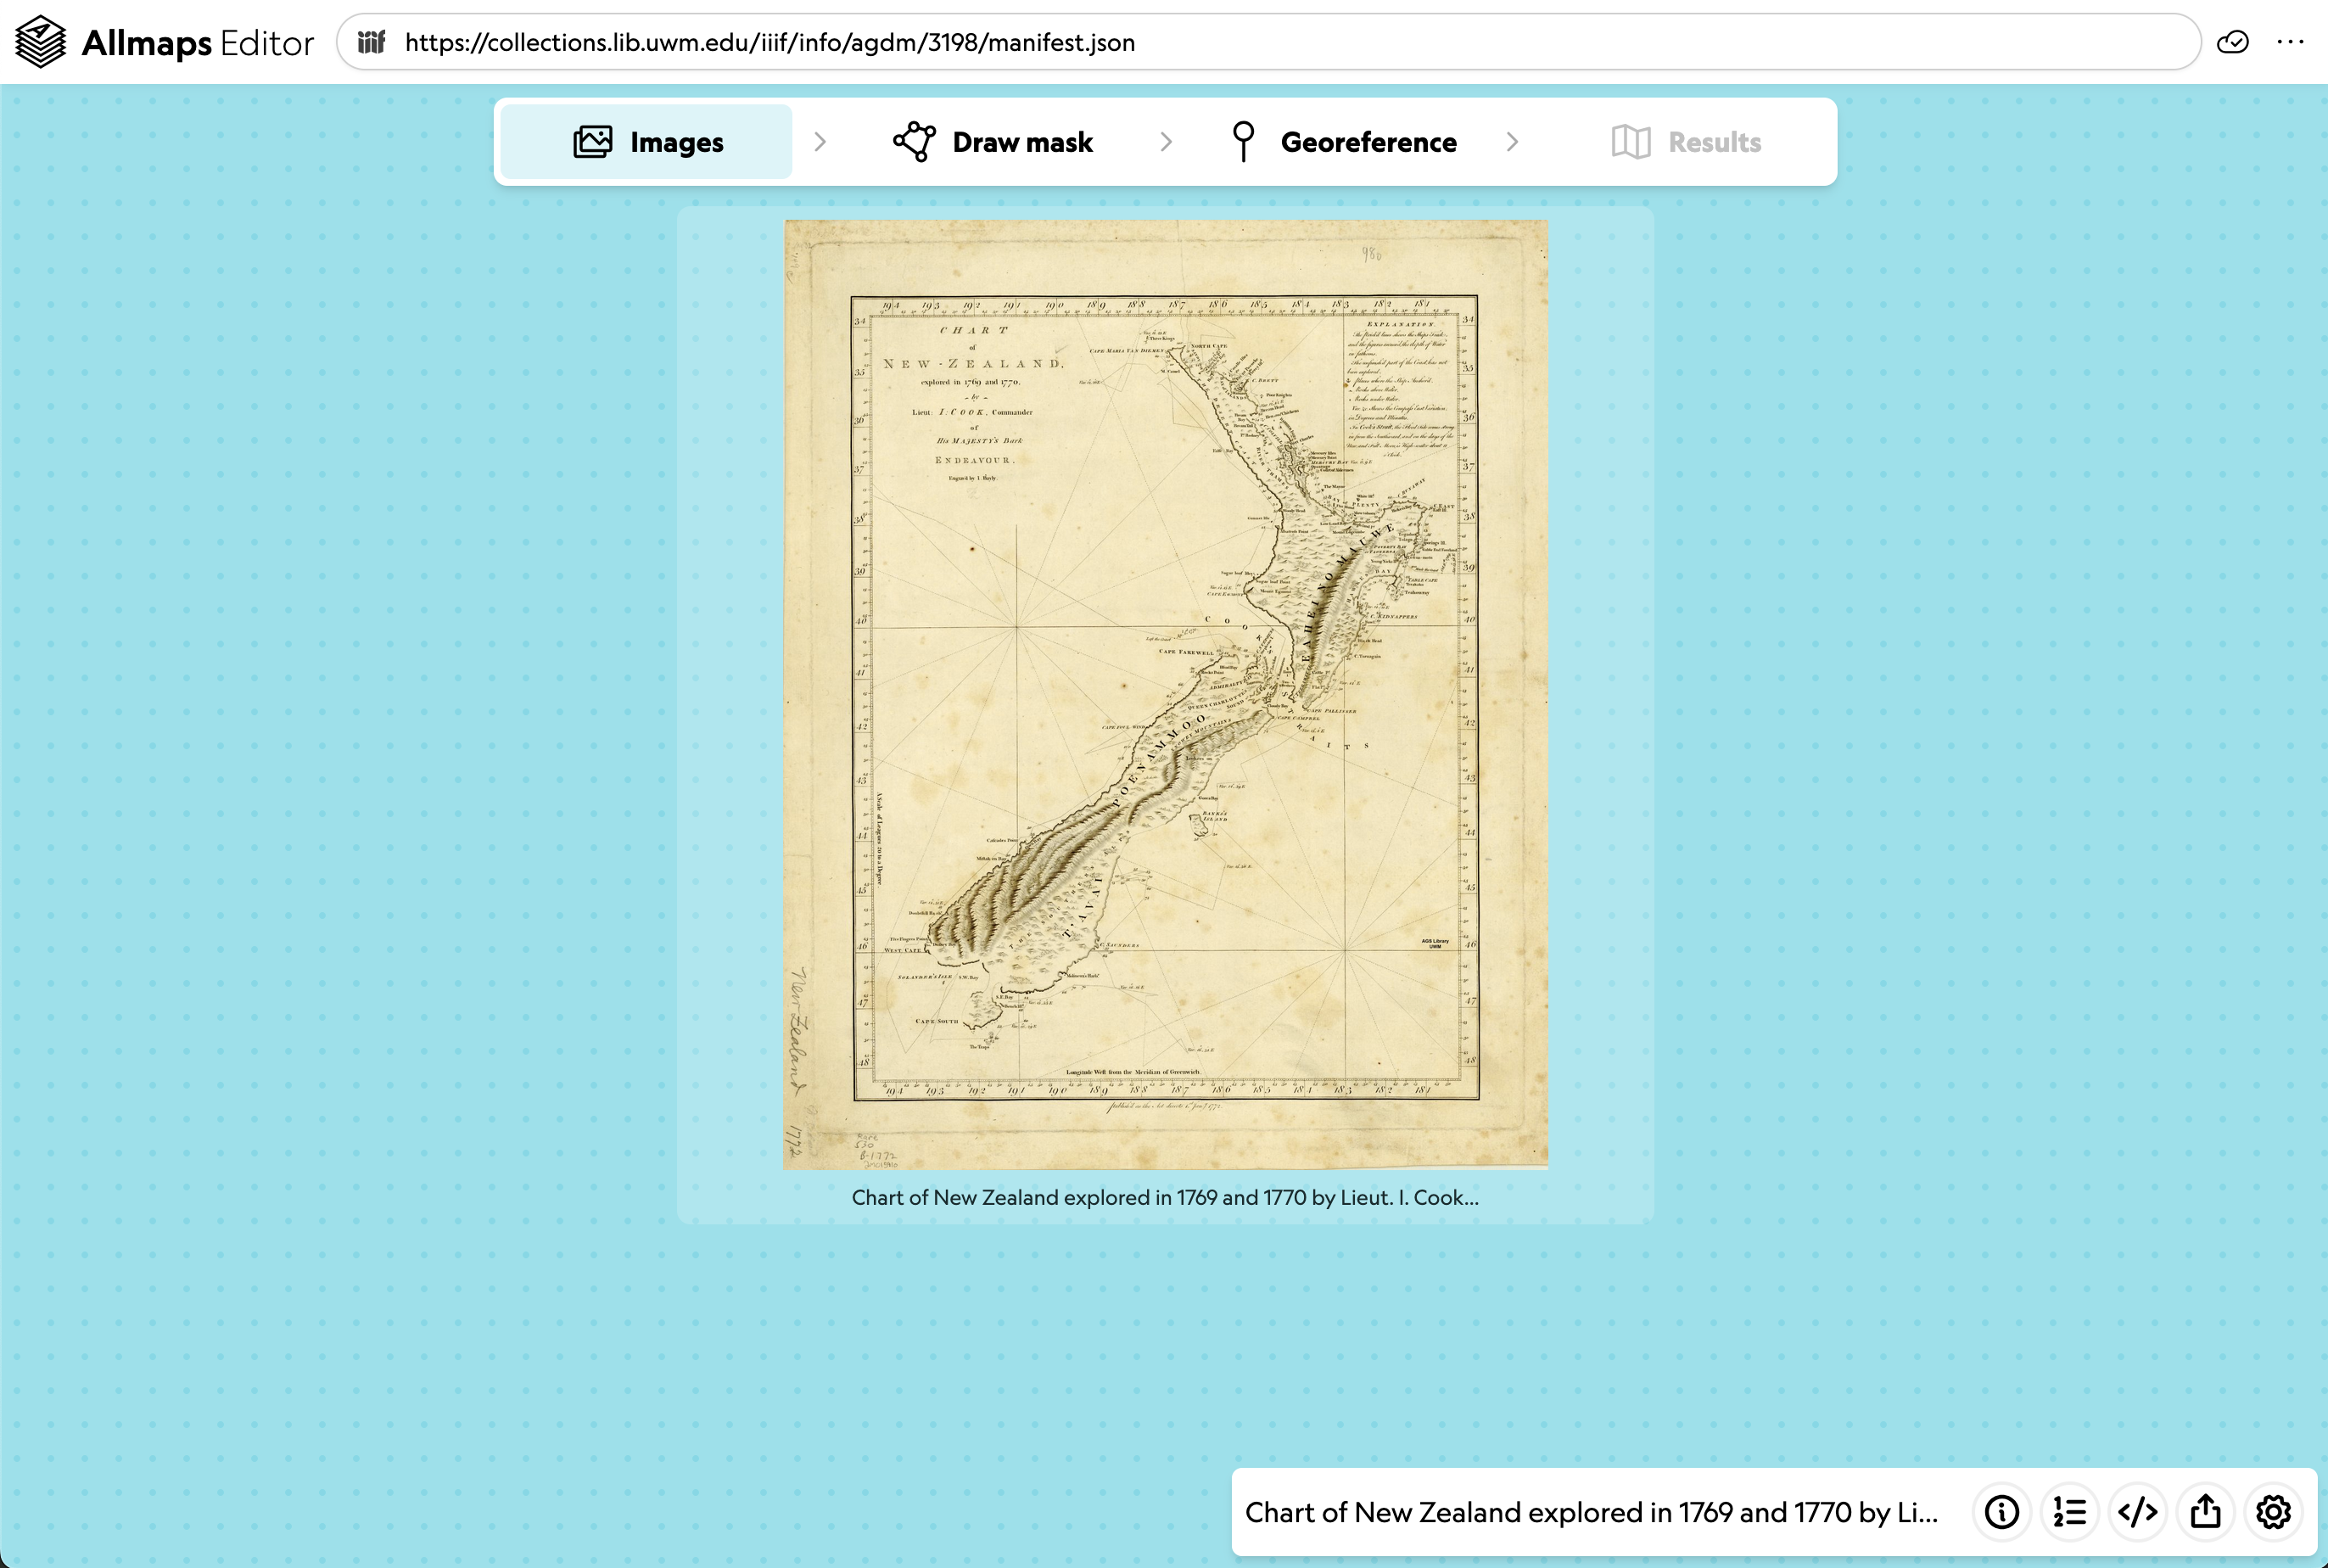
Masking
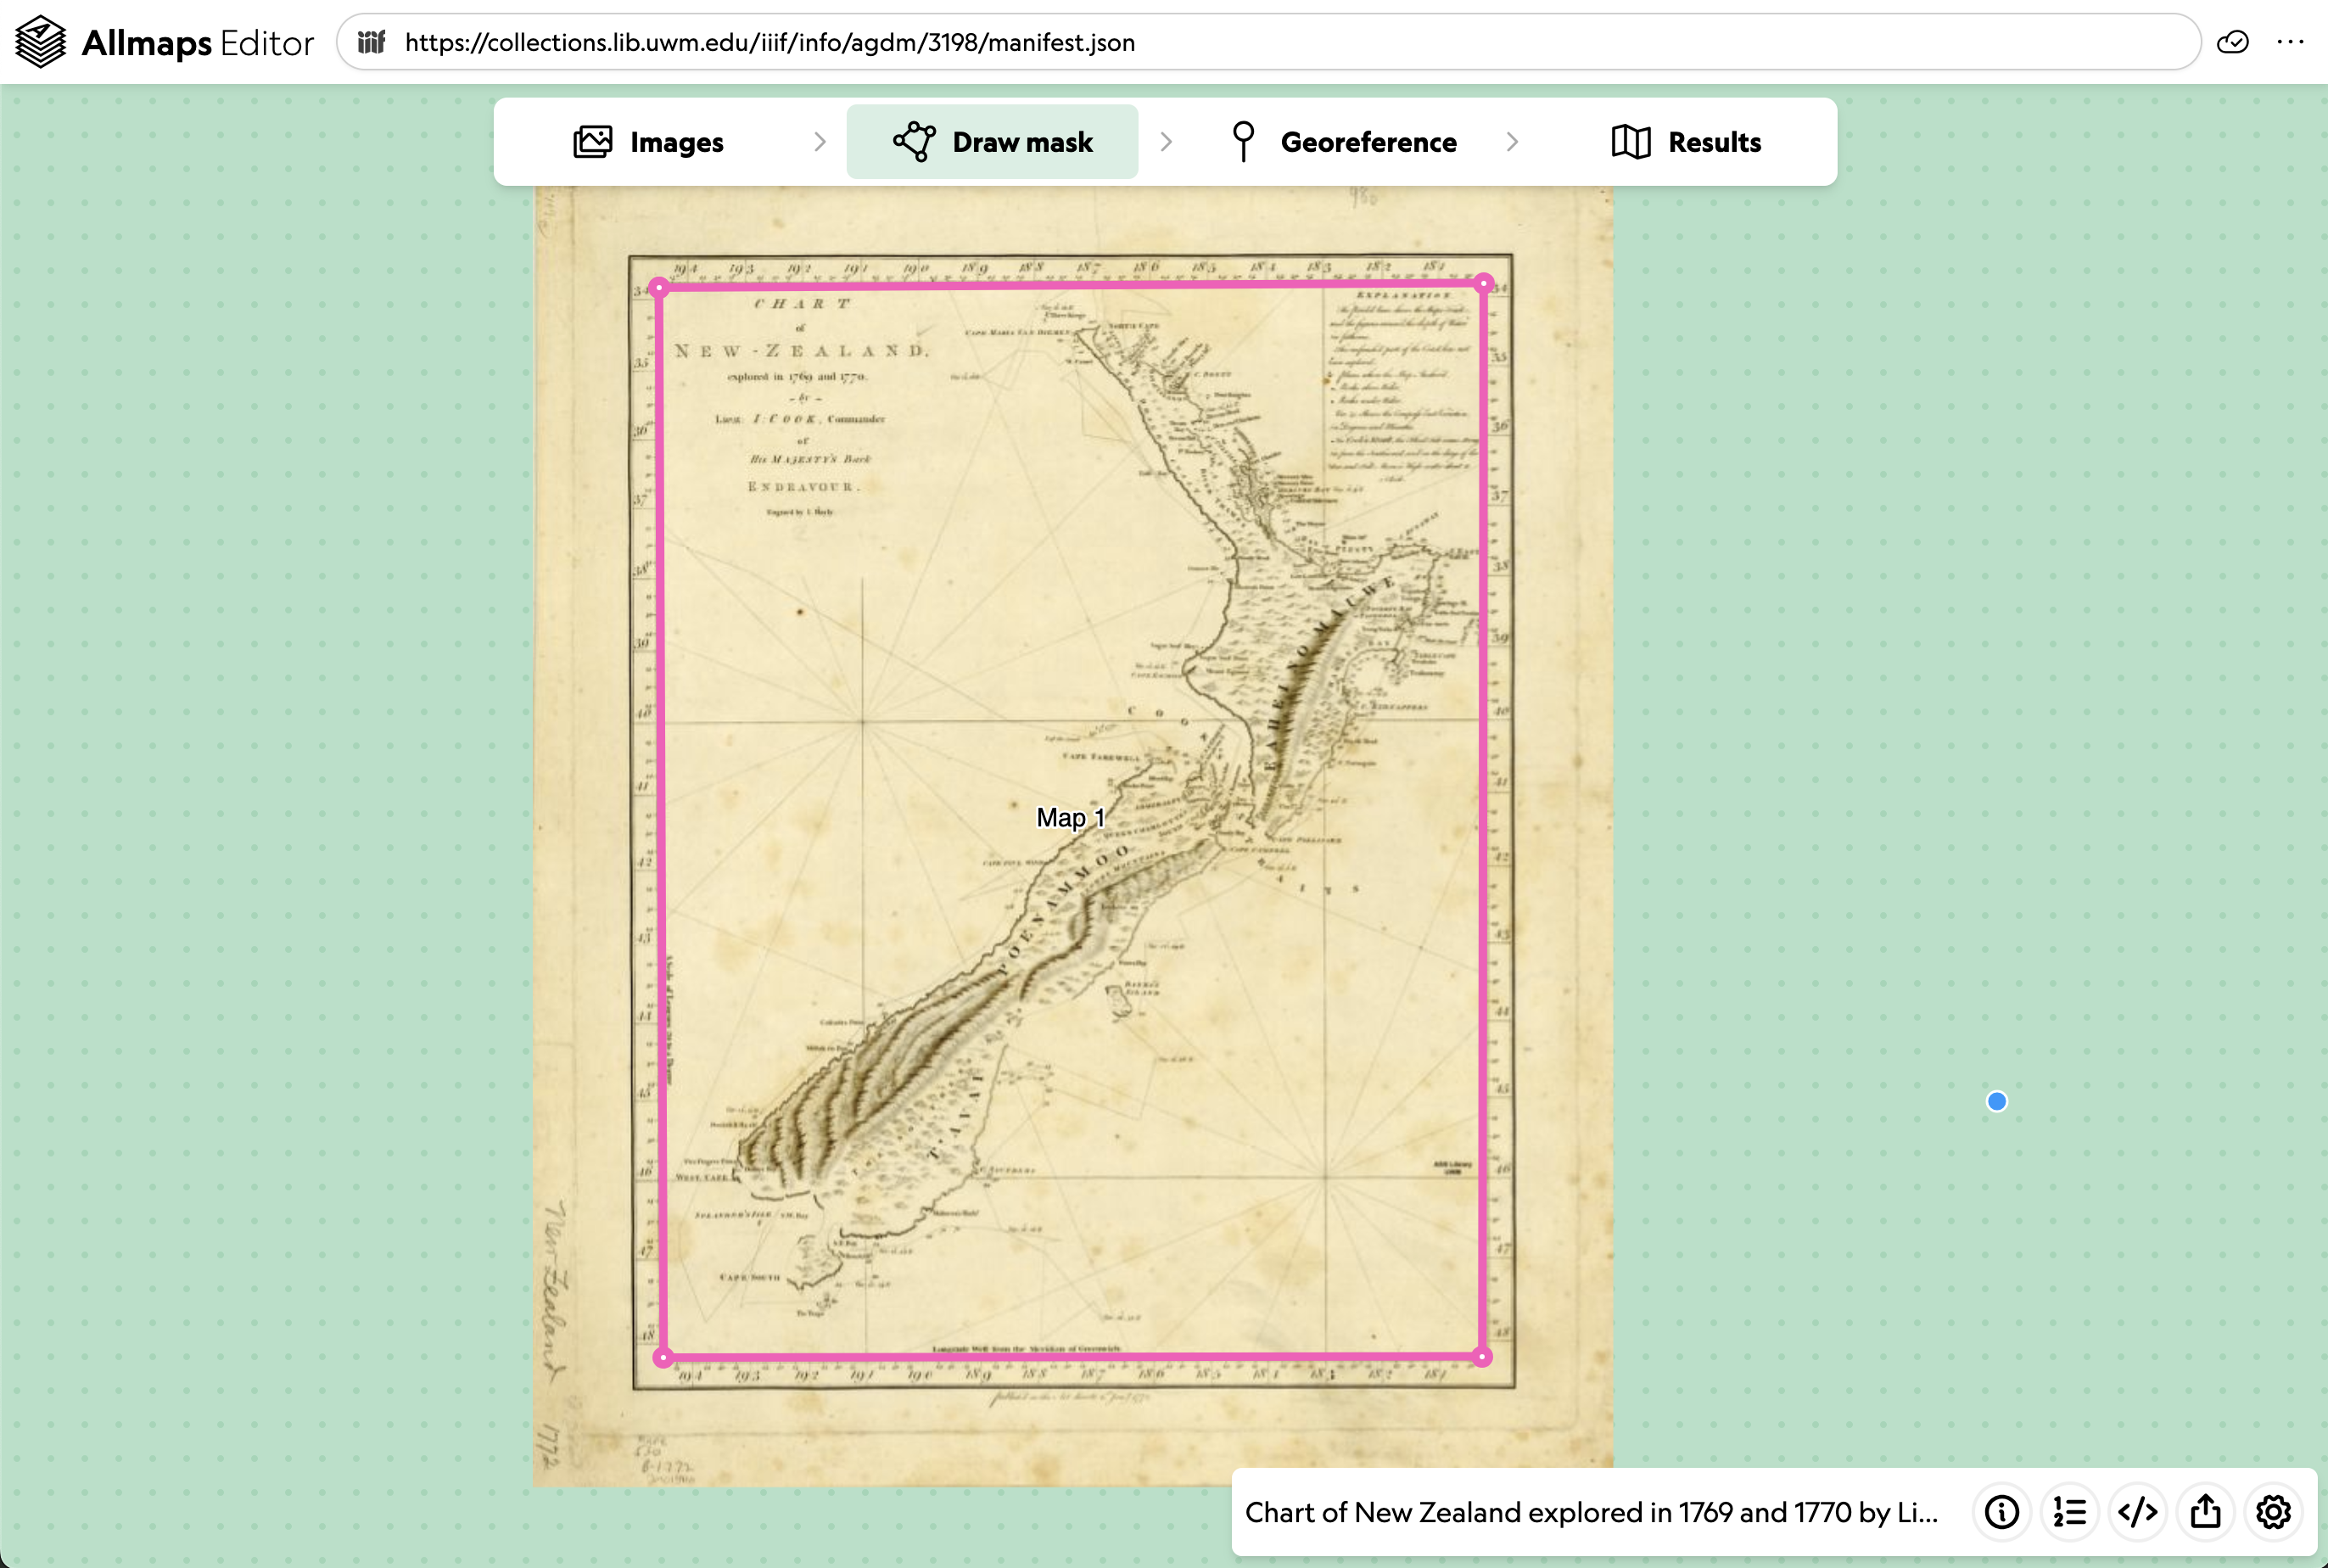
The first step is adding a clipping mask. This involves drawing a line around the “map” areas of the document to exclude the collar or marginalia. In other words, you’re identifying the part of the scanned image that you want to georeference. Only parts of the image inside the mask will be warped. In the Allmaps lexicon, one mask defines a “map” on a region of the “image”.
Use the Draw Mask tab to add a mask. Click to add points, and double-click to close the polygon. If you mess up, click Cancel to start over.
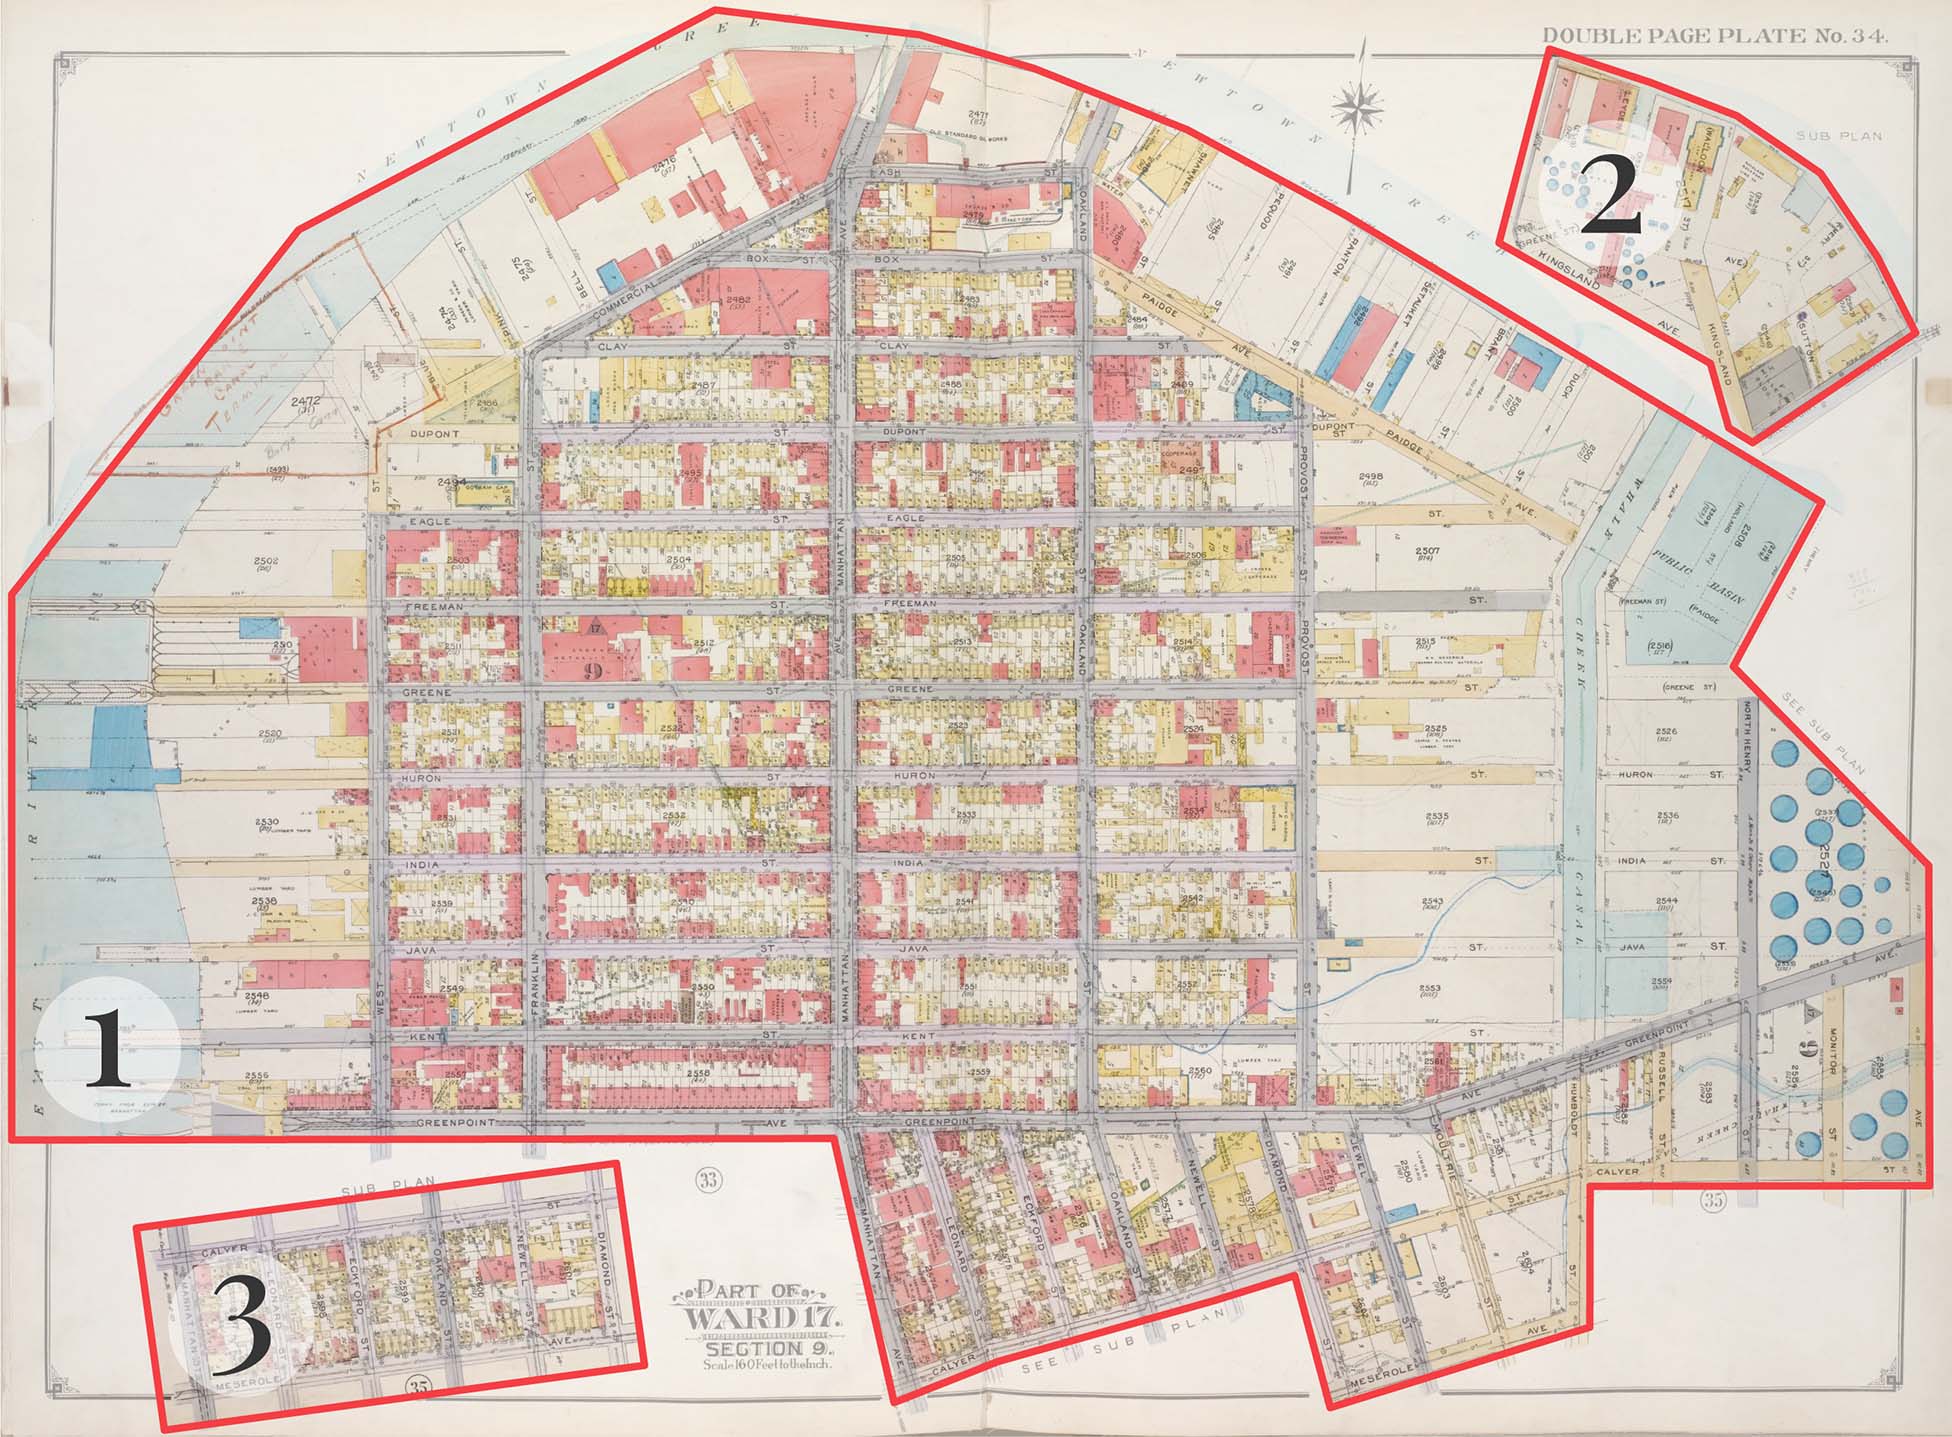
It’s possible your image includes multiple maps! Each map gets its own mask.
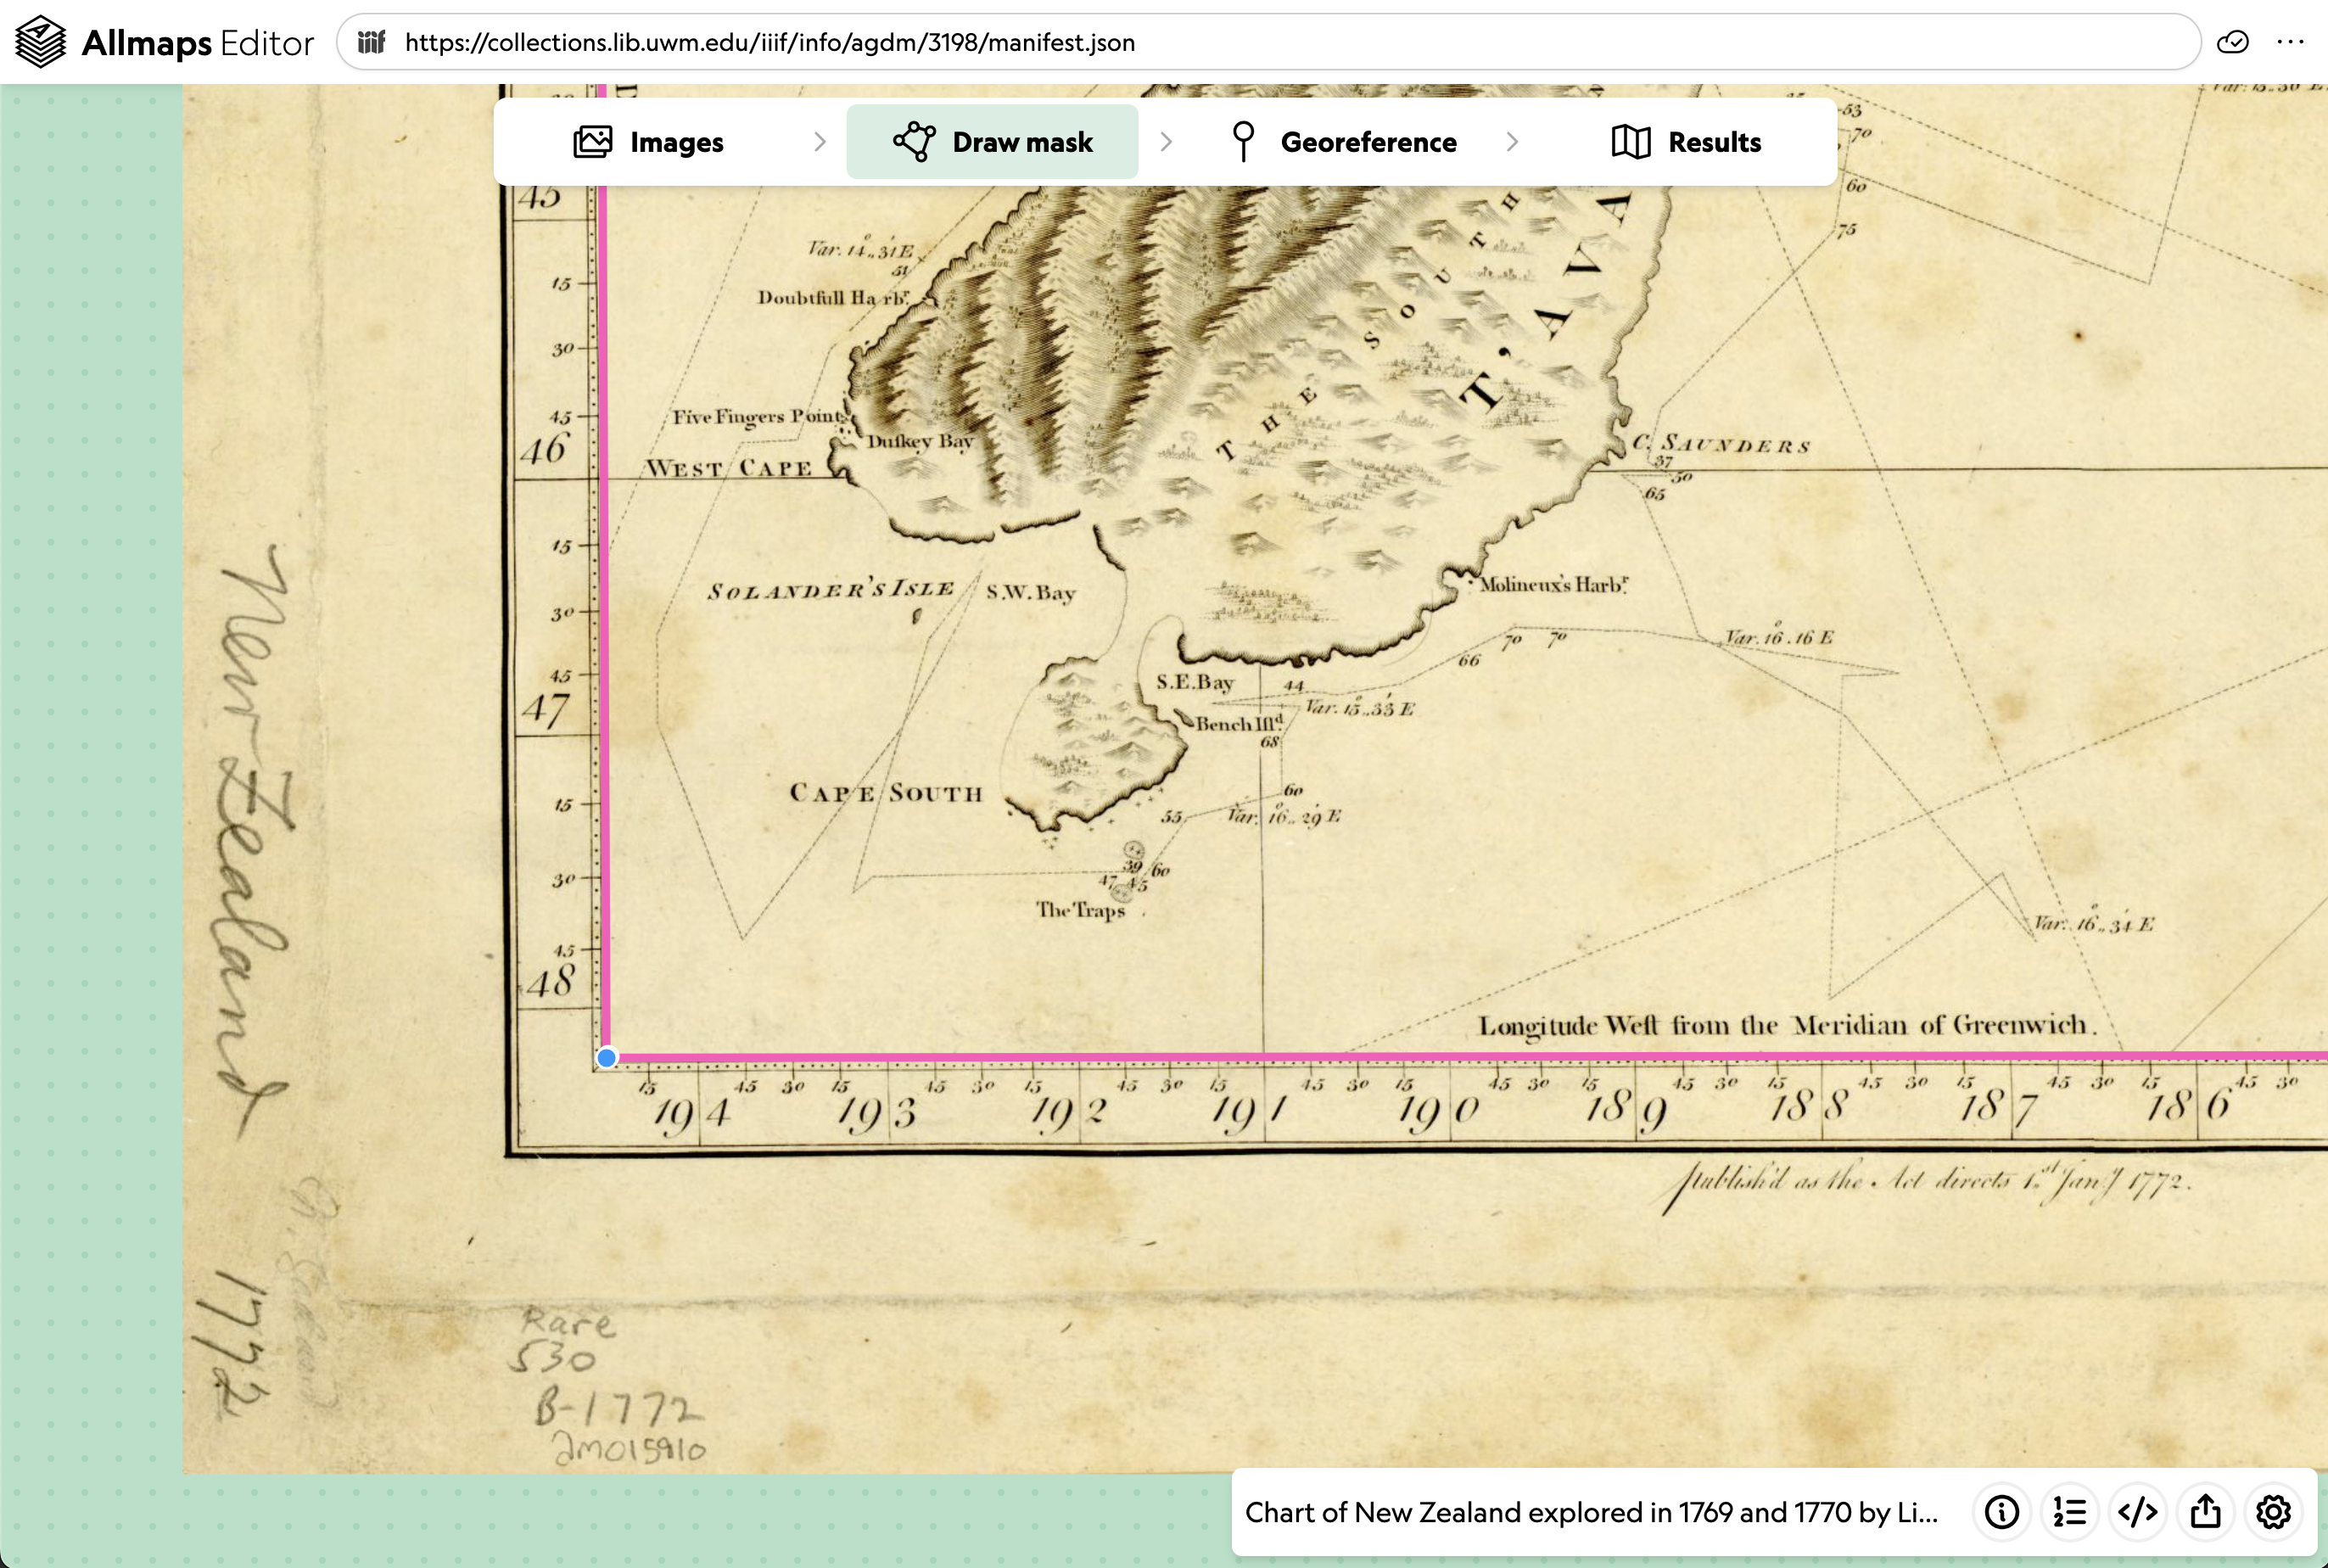
Much of the time, your mask will simply be a rectangle drawn just inside the map’s neatline.
Ground Control Points
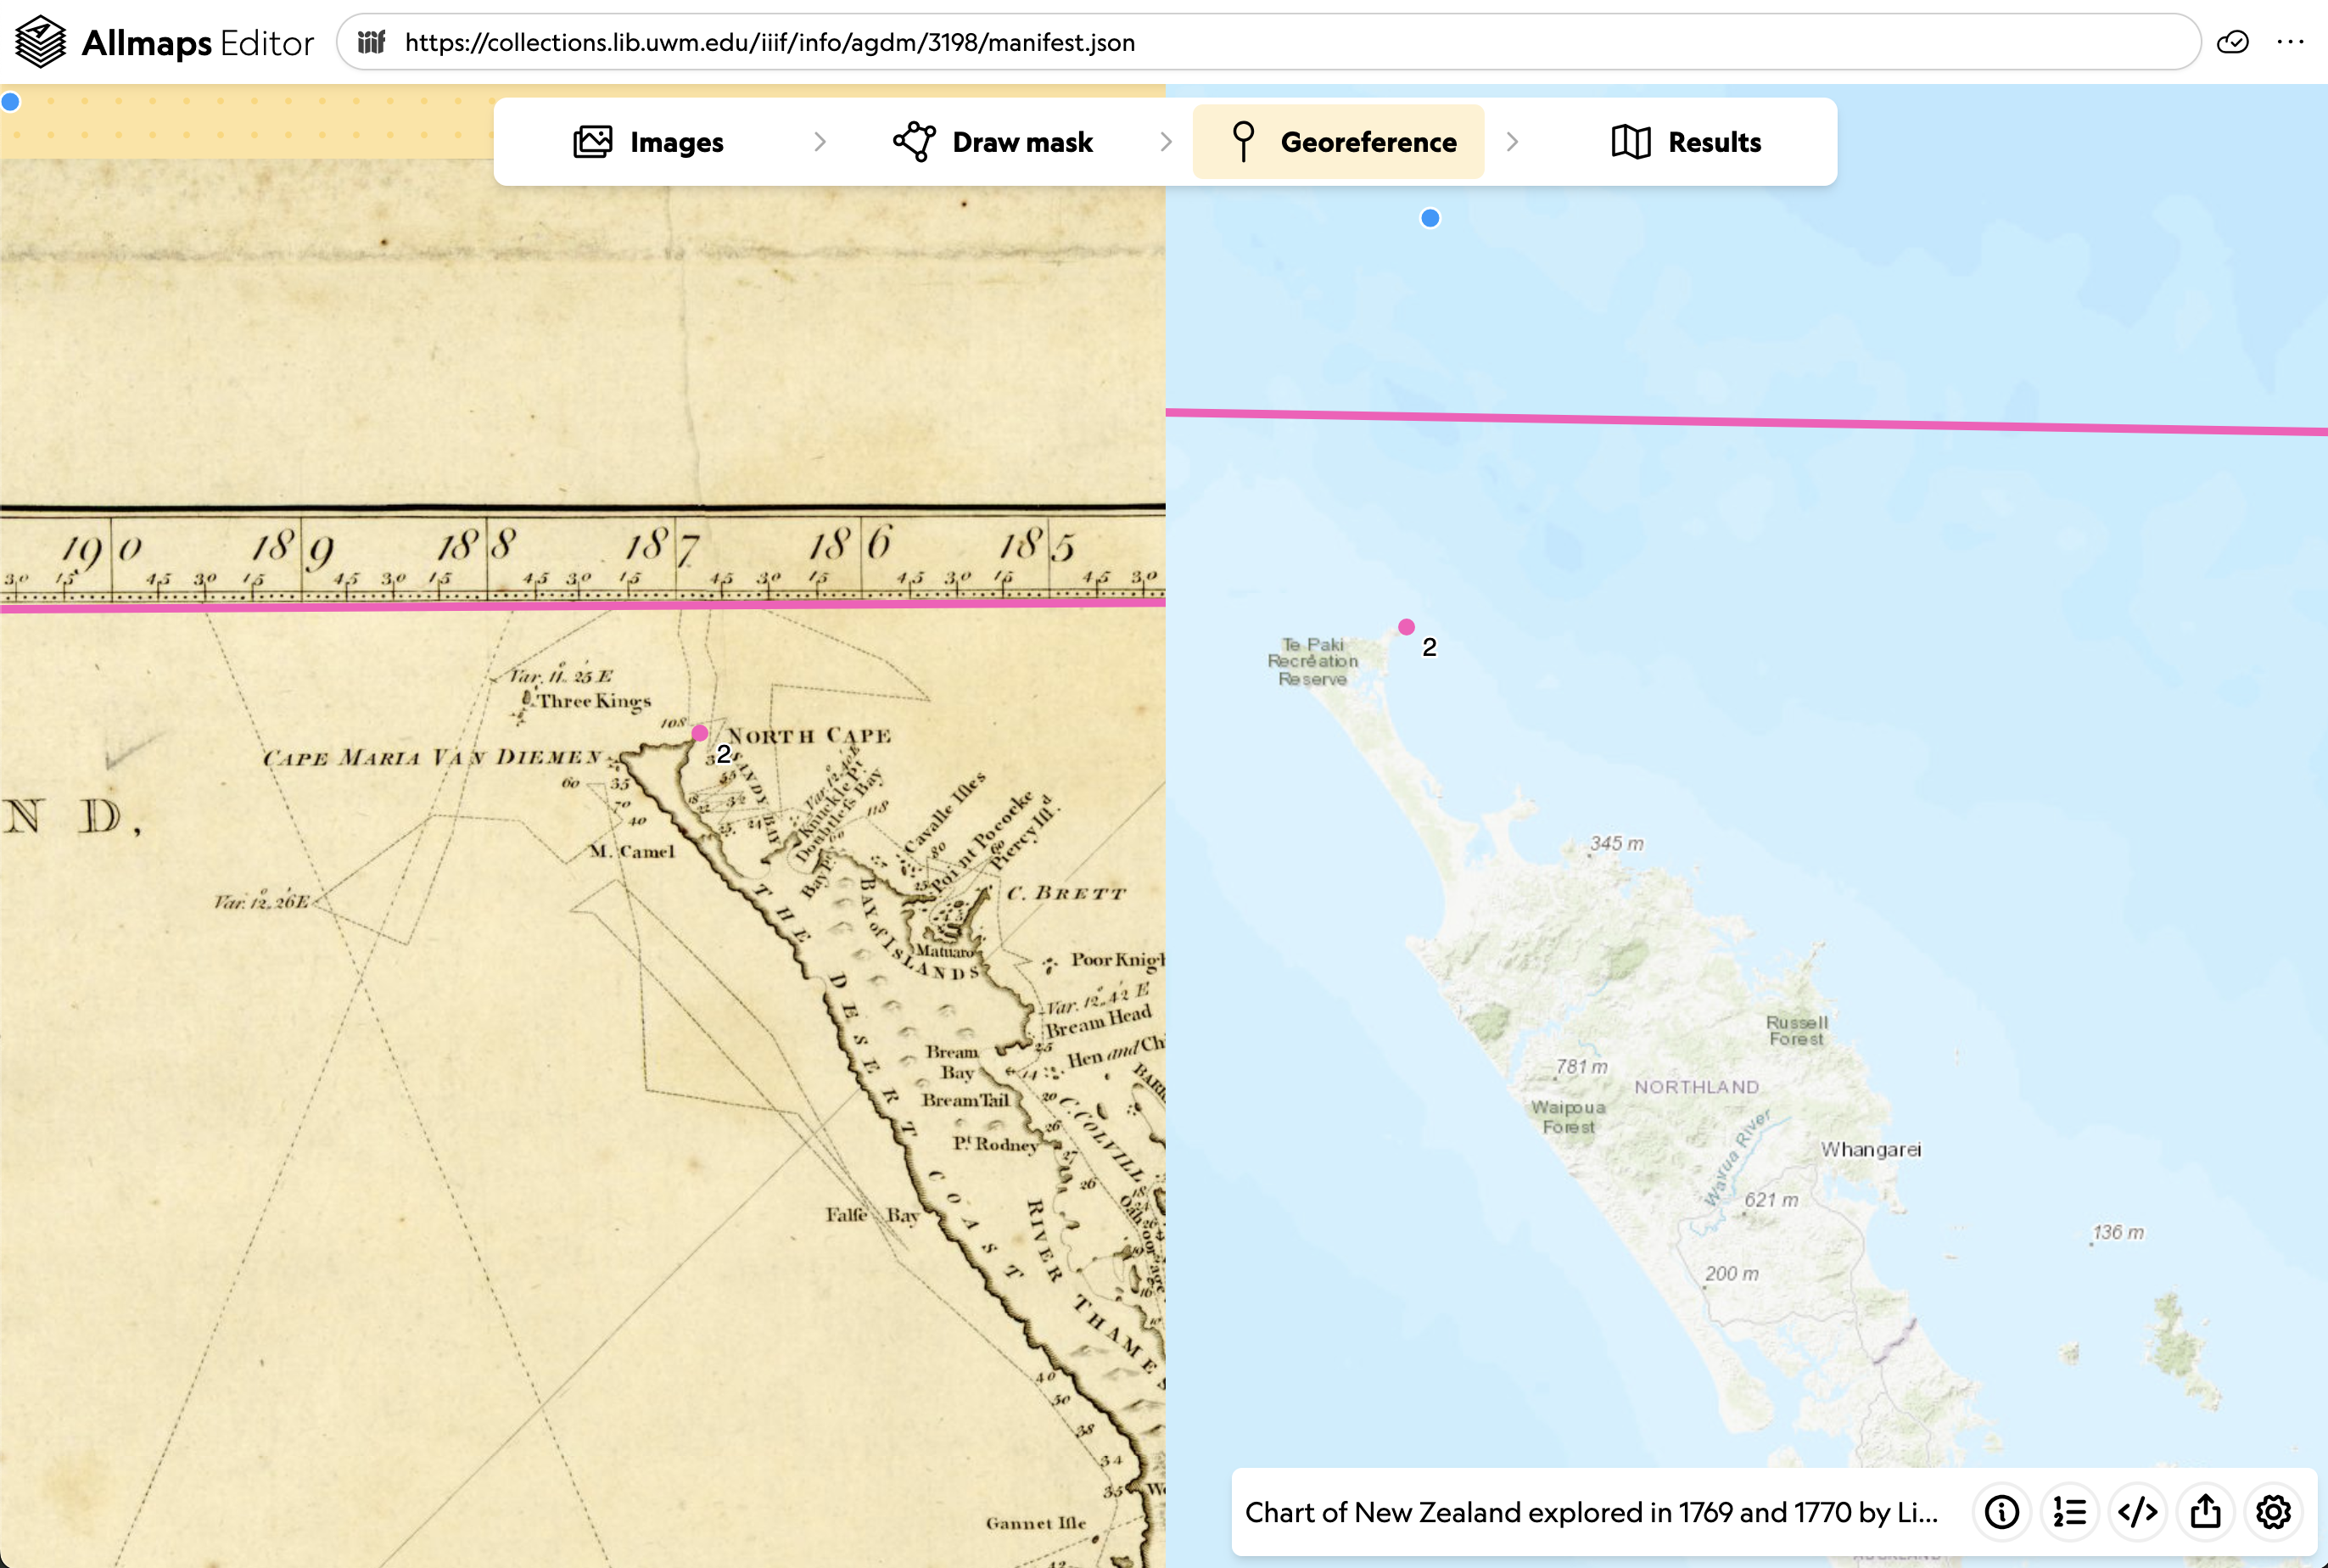
Ground Control Points (GCPs) guide Allmaps in aligning the scanned image (left side) with real-world geography (right side).
Use the Georeference tab to begin placing GCPs. To create one, find a location that clearly matches on both sides—such as a street intersection or the corner of a recognizable building. Click the same spot on both images.
GCP Best Practices for Urban Atlases:
- Avoid water bodies – they change too much over time to be reliable.
- Use roads and buildings – as long as they haven’t been torn down or significantly altered.
- Check your progress – sometimes only a few GCPs are needed. Too many can actually introduce unwanted distortion. A good check-in is after placing 5–10 points.
(Source)
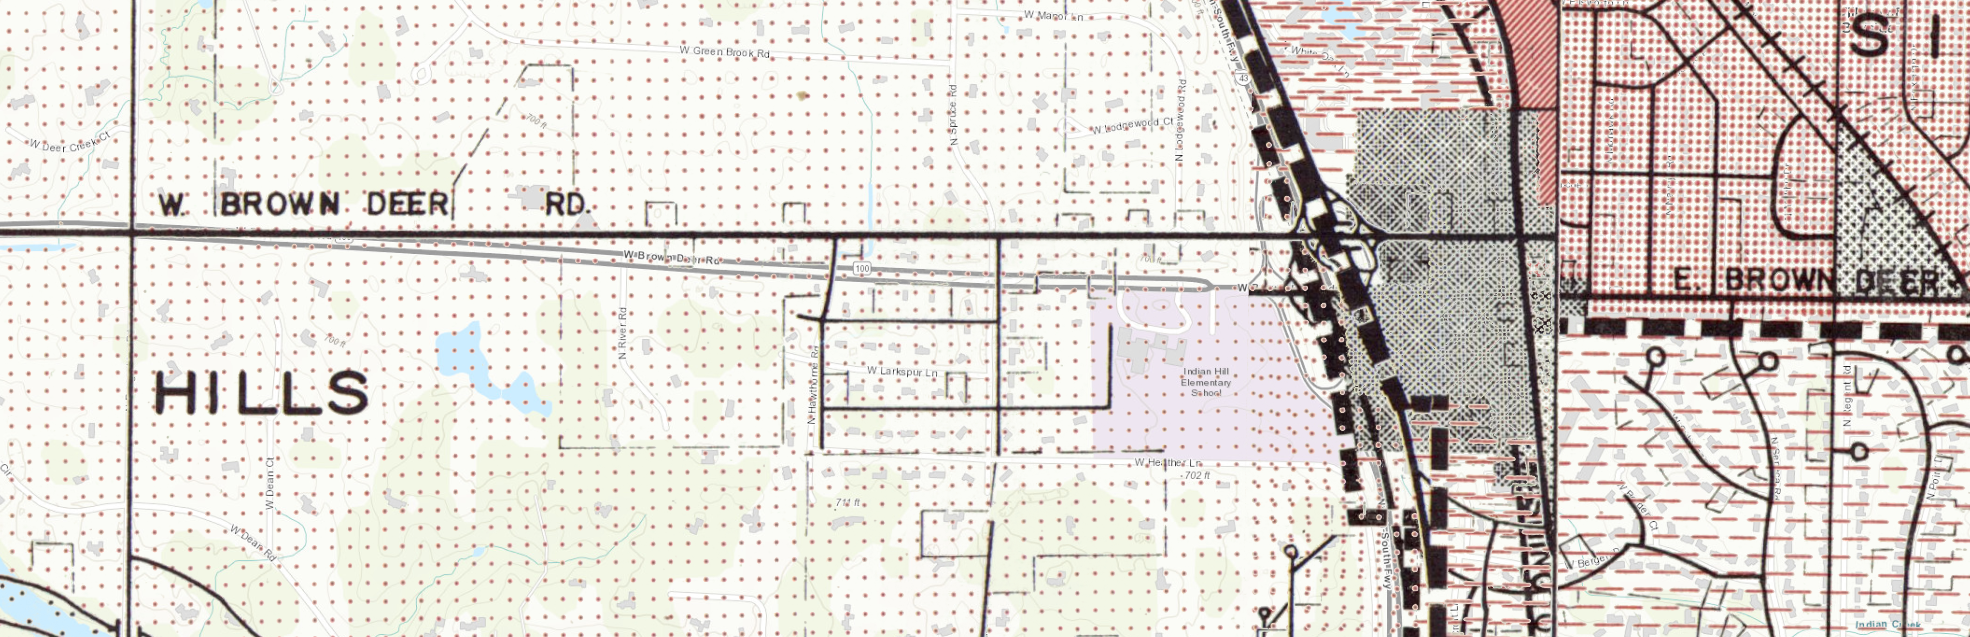
Remember, landscapes change: roads shift, water levels fluctuate, buildings appear and disappear. For example, using Brown Deer Road may not always be ideal:
What is this doing?
Behind the scenes, placing GCPs in Allmaps creates a Georeference Annotation, a standard format for storing geospatial information associated with a IIIF image. The Annotation specification is maintained by the IIIF Consortium.
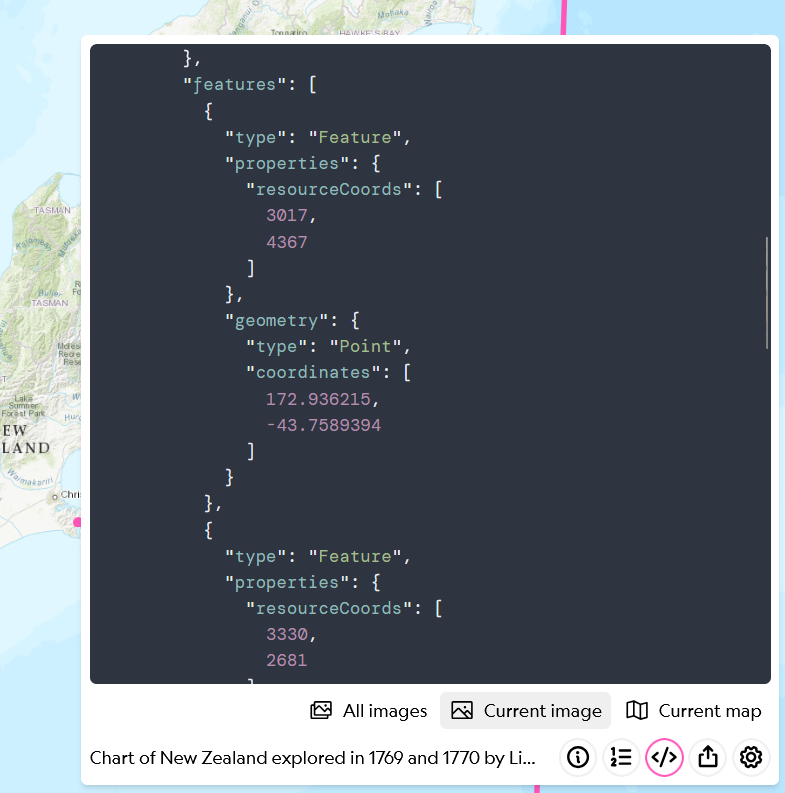
Each point creates a pair of values:
- Resource coordinates – pixel location in the image (e.g. 3017, 4367)
- Geometry coordinates – geographic location in longitude/latitude (e.g. 172.936215°E, 43.7589394°S)
{
  "type": "Feature",
  "properties": {
    "resourceCoords": [3017, 4367]
  },
  "geometry": {
    "type": "Point",
    "coordinates": [172.936215, 43.7589394]
  }
}
Allmaps uses this data to calculate the warping or stretching needed to align the image over the map.
6-digit coordinate precision is probably overkill — any excuse to link this XKCD comic on coordinate precision!
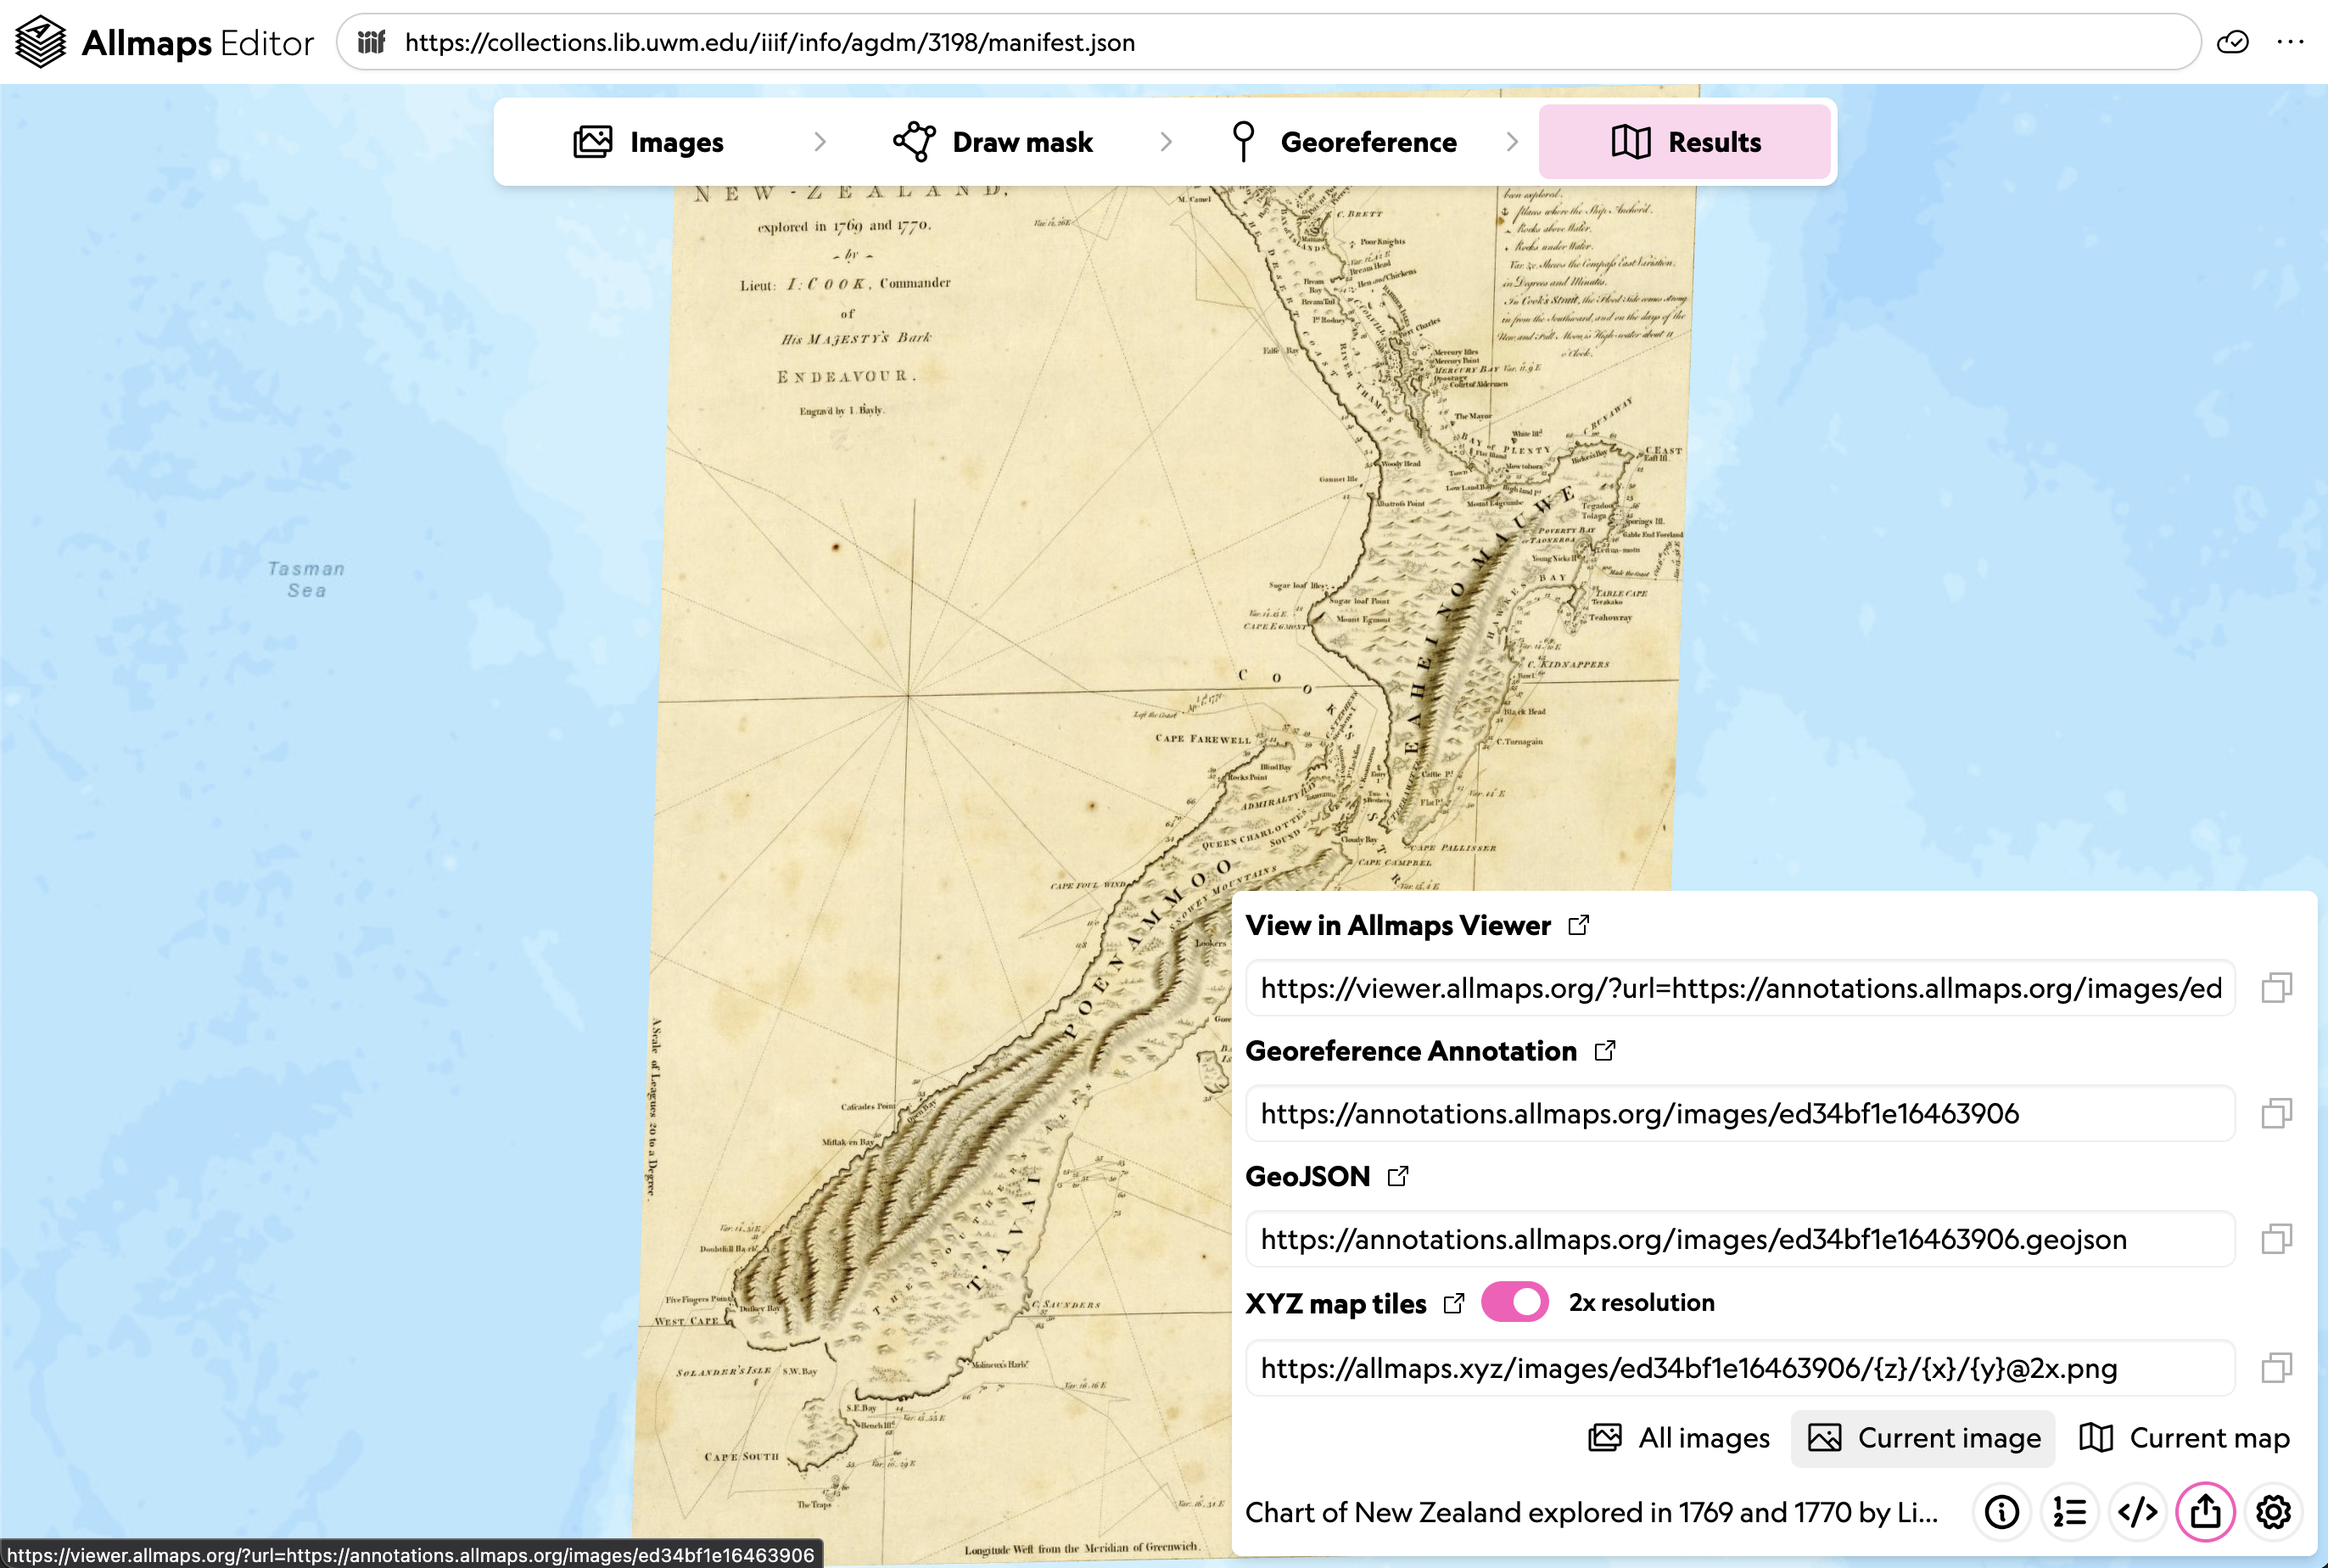
Georeference annotations are automatically created when you draw a mask or place a control point. From Allmaps Editor, here’s how you can locate a map’s georeference annotation:
- Click the green Export button
- Click the up-right arrow by Georeference annotation to open it in a new tab, or click the purple
</> Codebutton to inspect the annotation in Allmaps Editor
Here’s the georeference annotation for that chart of New Zealand:
https://annotations.allmaps.org/images/ed34bf1e16463906
That ID, ed34bf1e16463906, is called an Allmaps ID.
It is unique to the Allmaps data ecosystem.
It’s generated by passing the IIIF manifest through a hashing algorithm that produces a unique, 16-digit alphanumeric identifier.
Open the annotation in a new tab and inspect it.
Can you make sense of what each key and each value are communicating?
Can you locate the resource coordinates and geometry coordinates?
Results
The Results tab gives you a preview of the map with georeferencing applied. It’s a great way to check alignment and see if you’re on the right track.
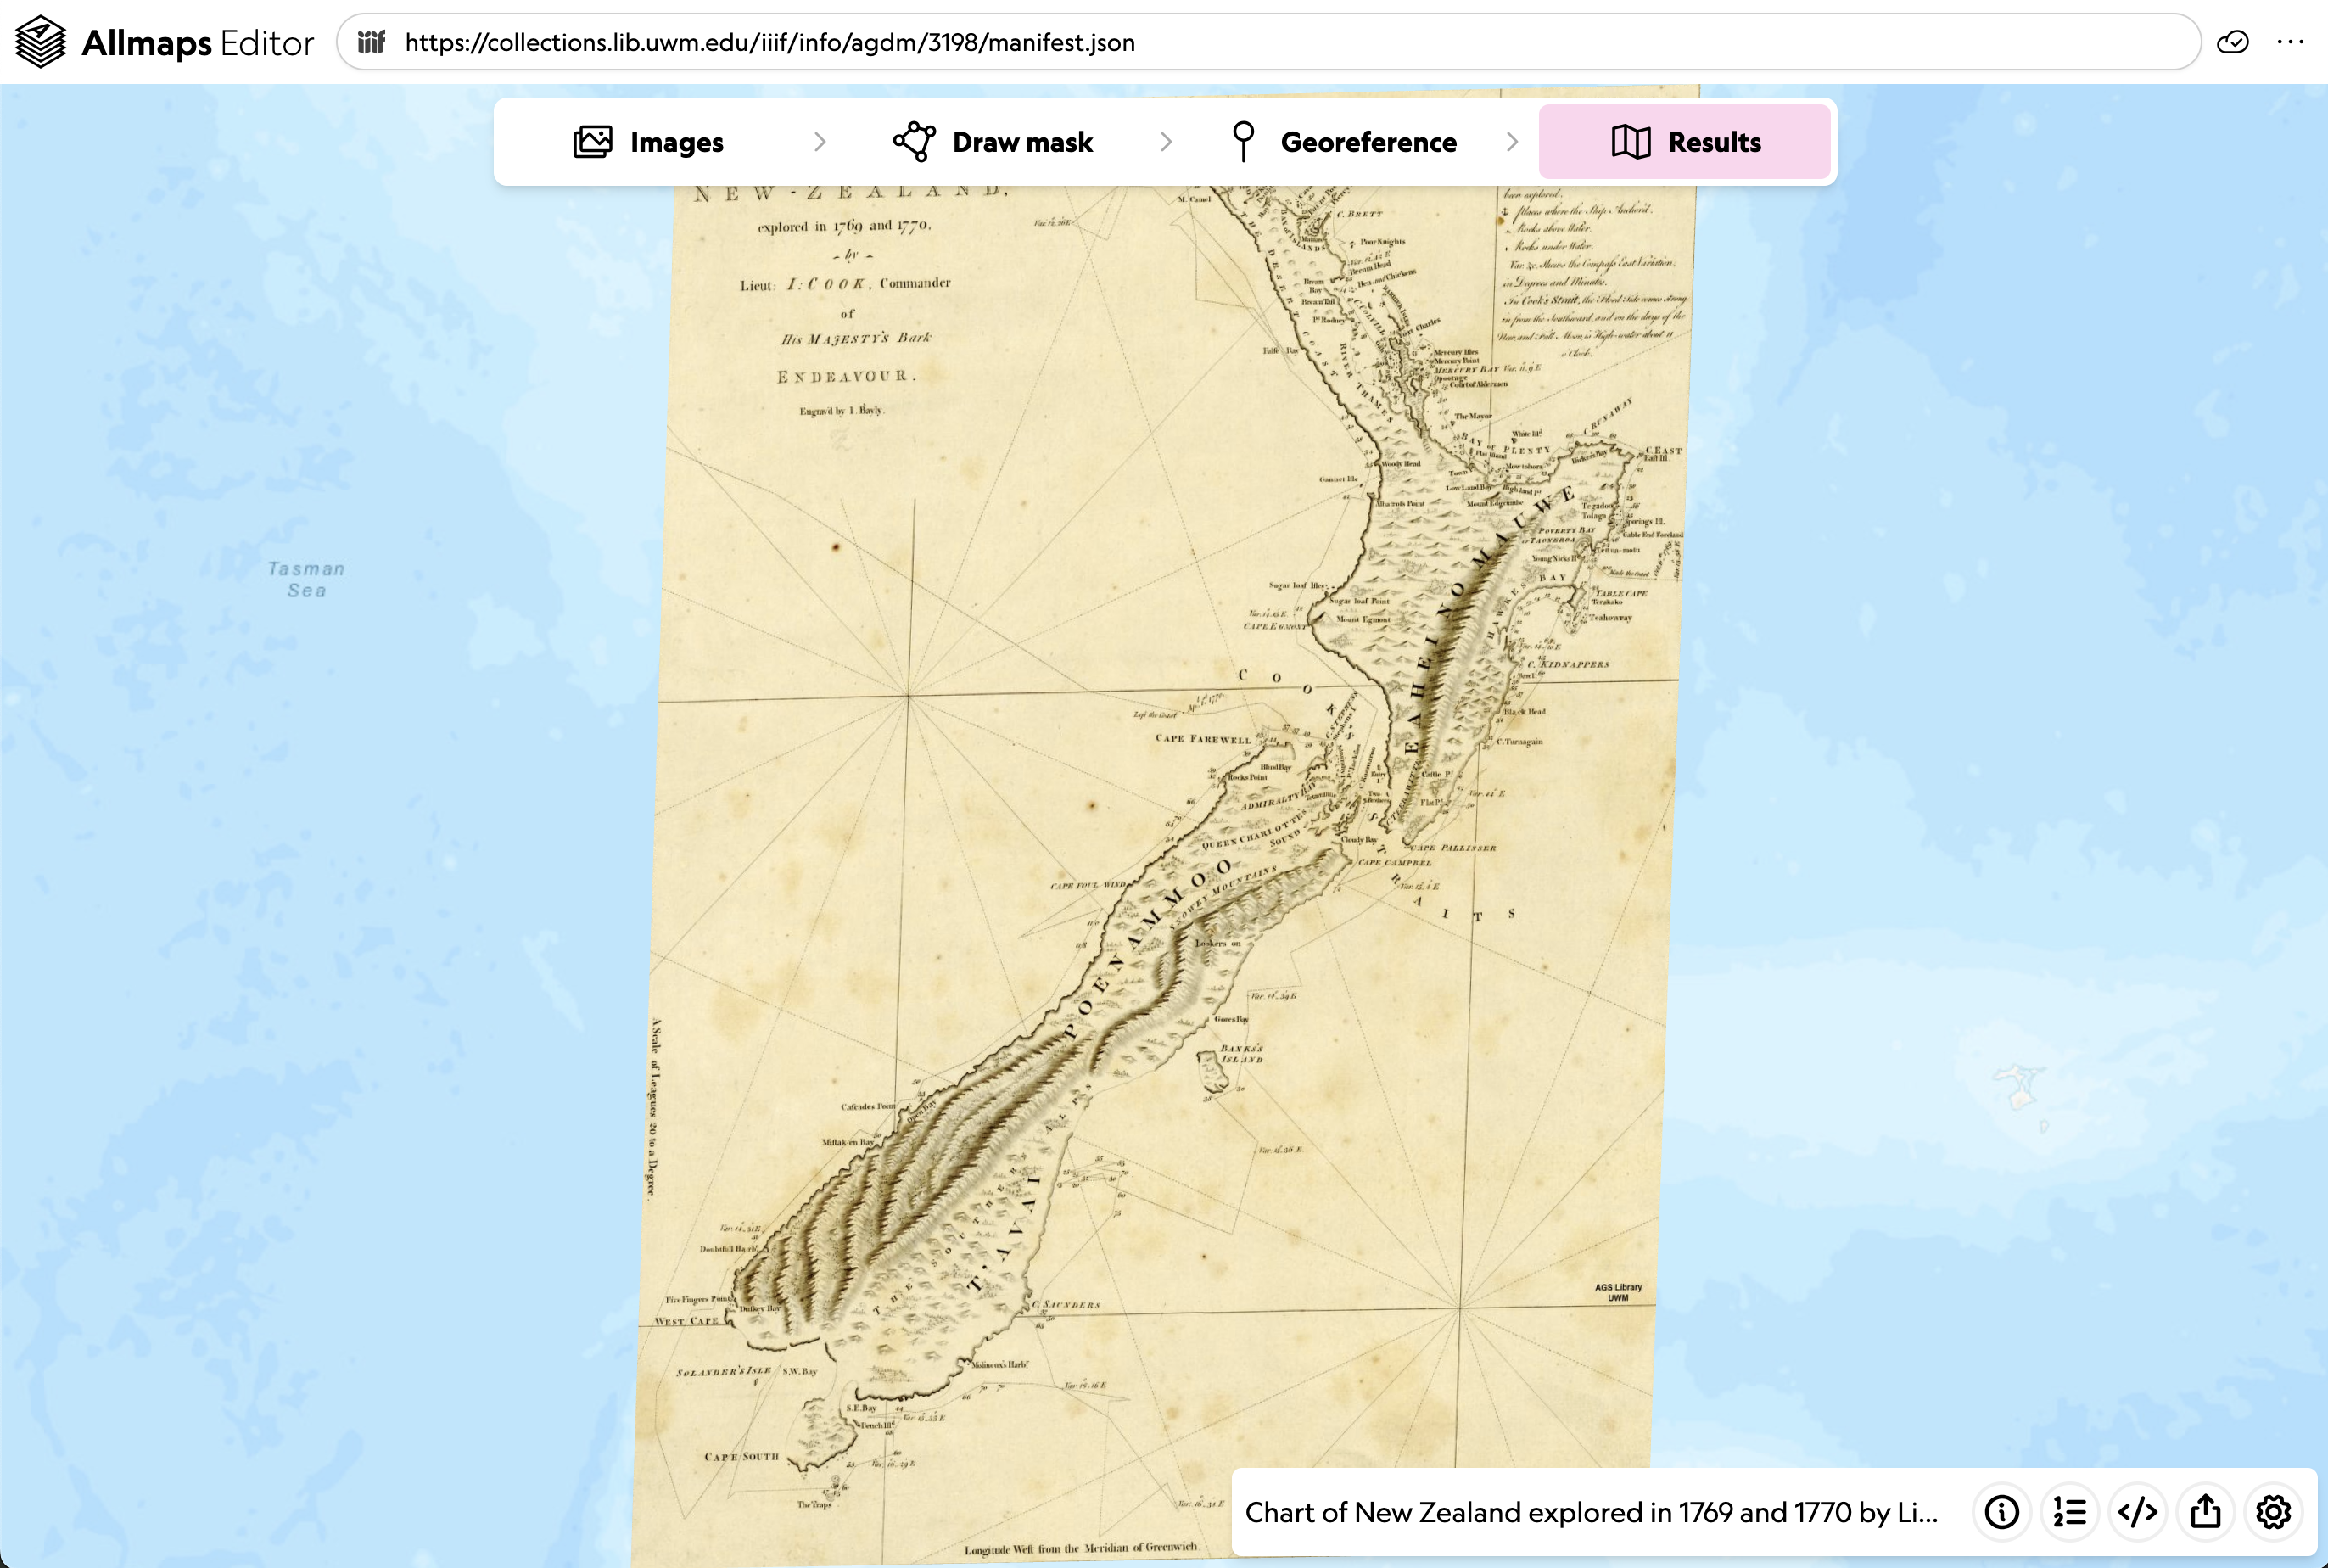
In the upper right, under export, you’ll see a drawer with more tools:
- Link to view in Allmaps Viewer
- Link to the annotation
- Code – shows the actual Georeference Annotation (JSON format). You can copy and reuse this in the Viewer.
- XYZ tile link (usable in web maps or GIS software)
On the bottom right, under maps you can find:
- Transformation and Projection to modify how the map is warped and how its coordinates are stored
- GCP List – lists all your points; delete ones that don’t work
The Transformation option controls the algorithm Allmaps uses to warp the image from your control points. Different algorithms will produce different results. Some stretch or distort the image more than others, so changing the transformation can change how you interpret the map, not just how it looks.
The Projection option lets you choose the projection used for the map’s geospatial coordinates. These settings are written into the georeference annotation, so they become part of the map data that Viewer, the tile server, and other Allmaps tools read later.
Compare transformation and projection options as different interpretations of the same control points, and pay attention to places where the map stretches, bends, or preserves local detail.
We’ll explore the Viewer in the next lesson. For now, click the View in Allmaps Viewer link in the share menu to continue.